Review: The Lucid HD-7

Earl Green has graced us with another review with his thoughts and use of the Lucid HD-7 optic.
The Lucid HD-7
Back in October of 2011, Simon Beeson of S&J Hardware contacted me and asked if I was willing to conduct a review of the Lucid HD-7 illuminated reticule red-dot optic. So, in conjunction with my initial test of the NEA carbine, I agreed to test the optic.
Upon receipt of the scope I gave it a thorough once over and initially determined that I was indifferent to it. I’m a die-hard Aimpoint fan who started out his shooting/optic career as a die-hard Eotech fan I even tested the Eotech and supported the purchase of a large batch of them for an ERT team… until my Eotech let me down! I loved my Eotech, I think it has a very useful and cool reticule pattern consisting of a centre dot surrounded by a circle with cross hairs at the 12, 3, 6 and 9 o’clock positions. I found that when using my Eotech mounted on an AR, I could very quickly and easily figure out height-over bore for CQB or competitions and I have used one with great success during deer hunting sessions. My initial Eotech suffered from spring compression issues that were easily remedied but I also found that, while it was great on my AR, it suffered from reticule bounce on my M14 so I sold it to another AR fan and not a single complaint arose! I then got hooked on the Aimpoint series of optics and I’ve shot every offering that Aimpoint has put out in the market from the very early red dots through to the Comp M4 and the PRO. I have found that I have one complaint and that is that I don’t like the limited field of view some smaller diameter tubes and I love short optic tubes like the T-1 and H-1. So, did this affect my views regarding the HD-7? You bet!!! Does the longer tube limit this optic? Nope!
FEATURES
An initial examination of the scope reveals that it is an all black, rubber coated optic, made in China but distributed by Lucid LLC of Riverton Wyoming. The HD-7 was developed by a couple of US competition shooters based on the experience that they gained in 3-gun competition. They strove to design an optic that was rugged, versatile and inexpensive and it appears that they have been successful. I’ve found that many shooters are scared off by optics that are made in China and equate them to the various Airsoft knock-offs that have proliferated the market however, this time, they might be surprised.

So, about the optic… like I stated above, it’s a red dot scope that looks a bit like an ACOG but the resemblance ends at the looks. It runs on a single AAA battery that slides into a screw-cap covered compartment that is situated on the front of the optic. According to the manufacturers and designers, the battery is supposed to last for upwards of 1000 hours and they report that it could possibly last as long as 5000. I like this feature because you can get AAA batteries almost anywhere and they are cheap! If I was running one on my competition gun or on a SWAT gun, I’d swap in a fresh battery before every match or before every call. According to the instructions, the optic will shut itself off after 2 hours. While I didn’t test this feature, I’m not a big fan of auto-shut off. I’ve learned that if you don’t remember to hit the “On” switch every hour or so, the optic will be off when you need it most (like when you have a deer right under your stand!).
Internally, the reticule is a multiple pattern red dot with zero magnification. There are four settings to the reticule: cross hair, circle with cross hair, circle with a centre dot and a two MOA dot (minute of angle = 1 inch at 100 yards). Selection of the reticule is accomplished via a knob on the left side of the optic that indicates that selected dot. On the left side of the optic there are push buttons for the on/off switch, and two arrow marked buttons for the brightness of the dot. The designers of this optic really put a lot of thought into power settings and the use of this optic in various environments. I found the wide range of adjustments to be perfect for conditions that ranged from bright sunny day use to low-light/night use. For those who wish to use this optic with night vision, there is no NVG/IR setting.
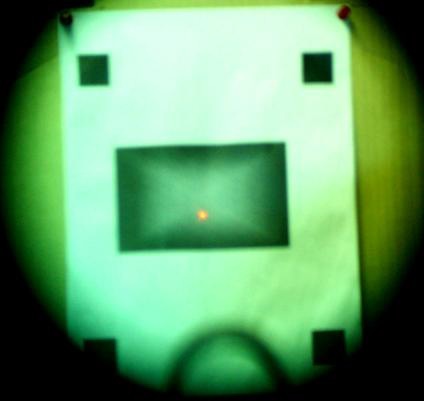
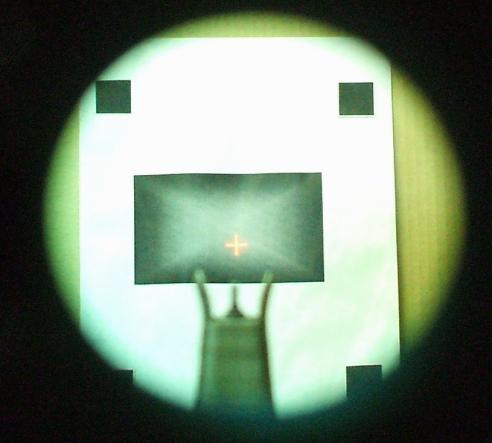
Below are pictures of the four differing reticule patterns. I know the formatting isn’t great but the patterns are clearly represented.

Red Dot Only

Circle and Crosshairs

Crosshairs

Circle Dot
OTHER FEATURES
They built in a photo-cell on the top of the optic that activates when the on/off switch is pressed until the reticule briefly dims, this indicates that the optic is in the auto-brightness mode. Depending on the amount of ambient light available, the dot with brighten or dim on its own when this setting is activated. I used this feature during a range session on a day where the conditions were sunny with cloudy periods. Whenever the sun came out, I noticed that the dot or reticule would automatically brighten then the dot would dampen down when the cloud cover kicked in! Very cool! What I didn’t like about this setting is that the brightness/dimness switches are disabled when the photo-cell is active. When I tested the optic indoors I found that when I moved from a lit room to a very dark room, the red dot would dim to the point where the dot was almost invisible. When I hit my weapon light, the red dot disappeared completely! Now, most shooters would never be using this type of optic for low-light CQB or room clearing but the LEO or military shooter needs to be mindful to not run the photo-cell setting during situations where the potential exists for entering darkened locations.
The exterior covering of the optic is of a hard rubber that gives the scope a matte appearance and thus dampens any reflection from the body of the optic. The rubber covering supposedly guarantees that the optic is 100% waterproof and fogproof and, from the look of how the turrets and switches are set up, I believe it. Unfortunately, I didn’t use the scope while playing Navy SEAL in the bath tub so I can’t speak to this feature.
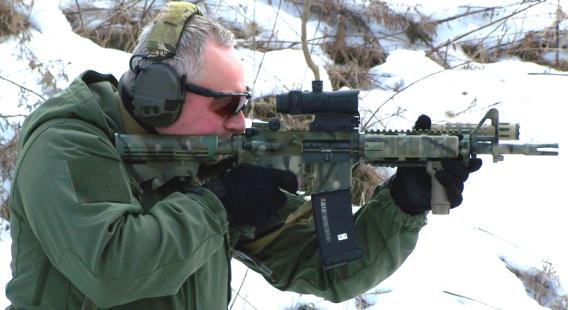
The optic has a built-in mount that will bolt to either a weaver or picatinny rail and tightens down via the use of two hex head bolts on the right side of the mount. This mount is integral to the body of the scope and cannot be swapped out, a feature that some users may not desire. I found that the integral mount does not hinder this optic when bolted on top of my flat-top AR. On my flat-tops, the reticule was an inch and three quarters over the rail and, when I took my normal cheek weld on the stock, the dot was perfectly centred in the scope. Now, many of you might be saying, “So what? A red dot optic is supposed to be free of parallax and when you can see the dot that is where the bullet will impact”… well Sparky, you’re partially right. I’ve never noticed much parallax in many of the red-dot optics I’ve used (and I’ve used a lot of them!) but I have noticed that in order to obtain consistent accuracy, you need a consistent cheek weld so that the dot is in the same place in the lens every time. For many of us, that is why we use a nose-to-charging handle cheek weld so that we end up in the same spot every time we mount the rifle. The Lucid is set up so that I was able to shoulder the rifle in my usual stance, hit my usual cheek weld and the dot was dead centre in the lens!
I also gave the scope a whirl with my back-up sights and I noticed that with my GG&G flip-up rear and fixed front I was getting a lower third co-witness. I switched the optic over to my NEA carbine and popped the folding Troy Battle sights up and… guess what? Same thing, a lower third co-witness!
Now about that on/off switch! It is covered by the rubber in order to maintain waterproofing and requires a firm push to activate. It has 3 or 4 settings…. notice my lack of decisiveness here? I just could not figure the damn thing out without memorizing the instructions and I’m a guy so…. you know, we don’t need no stinking instructions! Here’s why I found it complicated: one push turns the optic on, a second activates the battery only, another makes the red dot flash and activates the photo-cell, another push and hold for 3 seconds or one hour (whichever comes first), turns the optic off. This single switch performs four functions and the flashing of the red dot indicates that a certain function has been accessed but I just could never remember which flash did what. I am sure that if this was your primary optic that you mounted on multiple guns, it would be possible to figure it all out.
SHOOTING IT!
Ok, enough of the yada yada… how does this thing shoot?
In my initial test of this optic, I mounted it on a 14.5 inch NEA carbine and shot it with XM193 ball ammunition and some 55 gr. MFS that I had on hand. Initially, I fired from the bench at 25 yard targets in order to sight in. Sighting in was quick and easy due to the windage and elevation turrets that are easily manipulated on this scope. The turrets do not require the removal of covers or the use of screw
drivers, dimes, special tools or some other silly method of adjustment. The turrets have shallow thumb knurls on them and have markings from 0 to 5 with five stadia marks between each numbered interval. According to the instructions that come with the scope, adjustments are half MOA and they were right. Movement of the knobs provided positive, firm click adjustments that I felt are very positive and I would have no fear of them being bumped or moved inadvertently.
So, once I was all dialled in at 25, I found that I had zero issues making hits on a one inch patch at 25 yards. At 25 yards, I played with the cross hair reticule, the circle/ dot and the fine 2 MOA red dot. I noticed that there was no shift in point of impact from one reticule to the next!
At 100 yards, I managed 3” groups that I am sure I could tighten up if I used a magnifier. At 100 I used the dot alone and the circle with centre dot while shooting these groups. I was actually impressed! I know many of you are thinking that 3” at 100 isn’t that impressive but I managed these groups using a non-magnified optic on a gun that had a 14 lbs trigger at the time!

On my next range session, I was testing various 55 gr. handloads, I also wanted to test this optic on a different gun and I wanted to check out its versatility in speed shooting. I mounted it to my 11.5 inch Bushmaster AR, a gun that was built when Bushmaster was actually involved in quality control and I have shot about 8000 rounds through it. This gun is set up like an issued CQB gun that I once had.
After sighting the dot in, I decided to fire from 15 and 25 yards standing, I would shoulder the carbine, fire, switch reticules, shoulder to same POA (point of aim) and fire again. I went through about 40 rounds in this fashion and found that I could consistently put rounds on top of one another or in very close proximity (within less than an inch) to one another using the red dot, the cross hair and the circle dot. Negatively, I found that I did not have much consistency with the circle and outer cross hairs. The circle and outer cross hairs do not have a centre point that would indicate where the round might impact. I found that the black patch I was shooting at would kind of float around in the circle and thus, the bullet impact would also float. While this floating was only about 2 inches to the left or right at 25 yards, it was disconcerting for me because I like fast precision when using a red dot. I also found that with this reticule it was hard to distinguish height-over-bore for CQB.
I also fired some snap shots and controlled pairs on an IPSC classic A zone and a business card sized target at 15 and 25 yards. I found that the 2 MOA red dot and the circle/dot were awesome for fast and accurate primary and follow up shots! In this fashion, I managed to shoot a 2” by 2”group of 30 rounds that I am convinced had to do with the small 2 MOA dot!
After my range session, I gave some thought to the utility of circle/outer cross hair reticule pattern and I believe that it would be my “go to” pattern on my turkey shotgun! It is very similar to the shot gun scope reticules that are popular on turkey guns! Place Tom’s head in the circle, press trigger, turkey dinner! This reticule would be perfect for the shotgunner using bird shot or buck shot and after a couple of range sessions, it would be easy to figure out how much of a pattern you would have in the kill zone at various distances based upon using the size of the target in the circle to predict distance. Unfortunately, I don’t presently have a railed shotgun or I would have tested this theory but I’m sure it would work!
I also found that I wasn’t fond of the normal cross hair pattern. I chalk this up to two things: firstly, I prefer red dots on carbines, second, the red cross hair was super bright and looked huge in the scope! This pattern would be great for accurate fire in a magnified optic and may work well with a magnifier but I had no use for it in a non-magnified optic, your mileage may vary.
So, with the availability of four different aiming patterns contained in one optic the question needs to be asked: “Why would you be switching reticule patterns in the middle of a match or hunting session?” I know I wouldn’t. I’d find my favourite reticule that best suits my needs on a particular platform and stick with it. If I was going to own one of these (and I might!), I would most likely be switching it onto different guns for different hunting seasons, sighting in before the hunt and sticking with the reticule I felt provided me with the most confidence. I doubt I will be running one on my teaching or competition guns because I prefer consistent platforms for those purposes.
So, would I recommend the Lucid HD-7? For the hunter, competitor or plinker who is looking for a good quality, versatile, inexpensive red-dot that has multiple features I certainly do recommend this optic. For the LEO or military user, I would be more inclined to go with a combat-tested optic until more information is available regarding the Lucid but that is just me.
The price point on the Lucid is great for the average Canadian shooter, about $279.00 from S&J and there is the availability of an affordable X3 magnifier that, when compared to the price of an Aimpoint or Eotech magnifier is highly competitive. Unfortunately, I was unable to test the magnifier this time but the optic got a good work out and I think I see one mounted to a couple of my guns in the future!